重新编译 OpenSSL 1.1 & NGINX 1.25 为 TLS 1.3 (CentOS 7), 按照你已经安装在服务器上的场景 o 旧版本 openssl 与 nginx 服务关联。
更具体地说,能够激活 OpenSSL 1.1.1t 为了服务 NGINX,它与旧版本一起运行。 OpenSSL 1.0.2k.
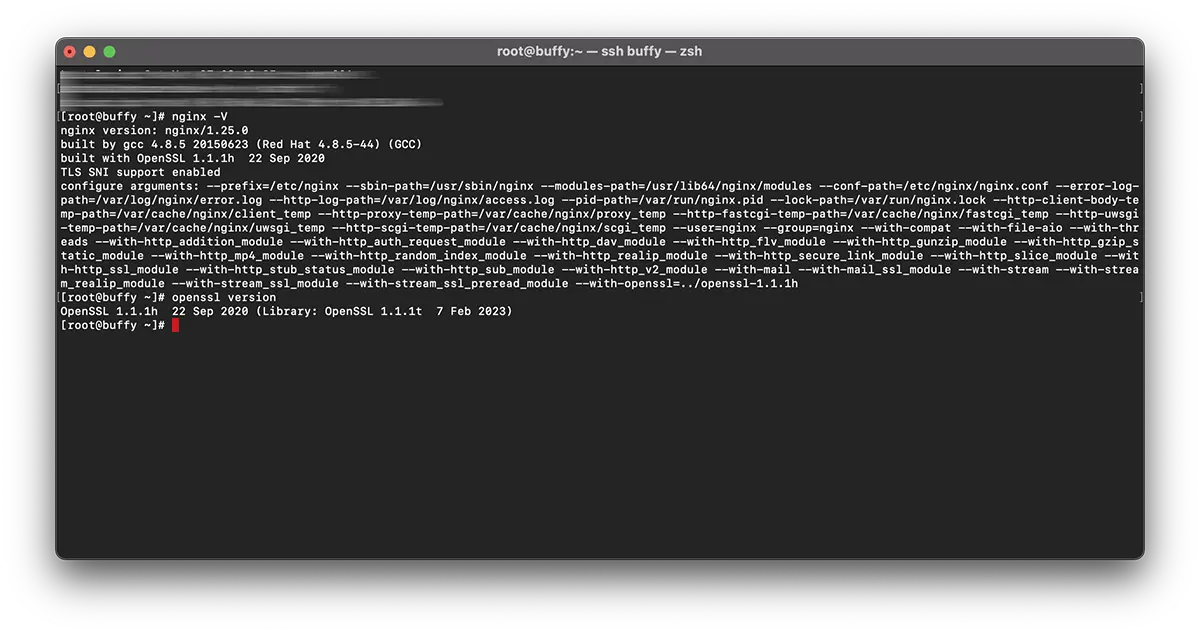
# nginx -V
nginx version: nginx/1.25.0
built by gcc 4.8.5 20150623 (Red Hat 4.8.5-44) (GCC)
built with OpenSSL 1.0.2k-fips  26 Jan 2017
TLS SNI support enabled
# openssl version -a
OpenSSL 1.1.1t 7 Feb 2023这意味着有两个不同的版本 OpenSSL. 通过“yum“(1.0.2k-fips) 和一个版本 OpenSSL 手动编译安装 (openssl 1.1.1t).
传统上,大多数人建议重新安装 'OpenSSL' 在服务器级别。 这将需要执行命令: yum remove openssl. 但是这里有一个大问题。 随着旧版本的卸载 OpenSSL,您可能还需要卸载一些依赖的应用程序。 例如: nginx, MariaDB-server, cerbot另外还有更多。
一个更简单的解决方案是重新编译 openssl 1.1 & nginx 1.25 为 TLS 1.3.
内容
重新编译教程 OpenSSL 1.1 & NGINX 1.25 为 TLS 1.3 (CentOS 7)
在我的示例中,重新编译是为了 nginx/1.25.0 & OpenSSL 1.1.1h 使用书店 OpenSSL 1.1.1t.
重新编译 NGINX。
1. 创建文件: nginx-with-tls13-compile.sh
sudo nano nginx-with-tls13-compile.sh添加脚本的位置:
#!/bin/bash

## nginx
NGINX=nginx-1.25.0.tar.gz

if [ ! -f "${NGINX}" ];then
    wget https://nginx.org/download/${NGINX}
fi

ND=$(basename $NGINX .tar.gz)
if [ ! -d "${ND}" ];then
    tar zxvf ${NGINX}
fi

cd ${ND}

## pre require package
## yum install gcc pcre-devel zlib-devel

./configure --prefix=/etc/nginx \
    --sbin-path=/usr/sbin/nginx \
    --modules-path=/usr/lib64/nginx/modules  \
    --conf-path=/etc/nginx/nginx.conf \
    --error-log-path=/var/log/nginx/error.log \
    --http-log-path=/var/log/nginx/access.log \
    --pid-path=/var/run/nginx.pid \
    --lock-path=/var/run/nginx.lock \
    --http-client-body-temp-path=/var/cache/nginx/client_temp \
    --http-proxy-temp-path=/var/cache/nginx/proxy_temp \
    --http-fastcgi-temp-path=/var/cache/nginx/fastcgi_temp \
    --http-uwsgi-temp-path=/var/cache/nginx/uwsgi_temp \
    --http-scgi-temp-path=/var/cache/nginx/scgi_temp \
    --user=nginx \
    --group=nginx \
    --with-compat \
    --with-file-aio \
    --with-threads \
    --with-http_addition_module \
    --with-http_auth_request_module \
    --with-http_dav_module \
    --with-http_flv_module \
    --with-http_gunzip_module \
    --with-http_gzip_static_module \
    --with-http_mp4_module \
    --with-http_random_index_module \
    --with-http_realip_module \
    --with-http_secure_link_module \
    --with-http_slice_module \
    --with-http_ssl_module \
    --with-http_stub_status_module \
    --with-http_sub_module \
    --with-http_v2_module \
    --with-mail \
    --with-mail_ssl_module \
    --with-stream \
    --with-stream_realip_module \
    --with-stream_ssl_module \
    --with-stream_ssl_preread_module \
    --with-openssl=../$(basename $OPENSSL .tar.gz)

make

sudo make install

nginx -V
保存新文件。
2. 制作新的可执行文件:
chmod +x nginx-with-tls13-compile.sh改写 nginx.service
3.备份 nginx.service.
cat /lib/systemd/system/nginx.service > /srv/nginx_service.txt(你可以选择任何你想要的路径 nginx_service.txt)
4.为服务创建文件 nginx: nginx.service
sudo nano nginx.service5.在文件中新建文件 nginx.service 添加行:
##  /lib/systemd/system/nginx.service

[Unit]
Description=The NGINX HTTP and reverse proxy server
After=syslog.target network.target remote-fs.target nss-lookup.target

[Service]
Type=forking
PIDFile=/run/nginx.pid
ExecStartPre=/usr/sbin/nginx -t
ExecStart=/usr/sbin/nginx
ExecReload=/usr/sbin/nginx -s reload
ExecStop=/bin/kill -s QUIT $MAINPID
PrivateTmp=true

[Install]
WantedBy=multi-user.target6.将文件复制到'daemon“。
sudo cp nginx.service /lib/systemd/system/nginx.service7. 复制文件后,使用以下命令更新文件权限:
sudo chmod 644 /lib/systemd/system/nginx.service8.重新加载配置 systemd 使用以下命令将更改考虑在内:
sudo systemctl daemon-reload9.重启 ngnix.
sudo systemctl restart nginx重新编译 OpenSSL / NGINX 为 TLS 1.3
10. 在文件所在的同一文件夹中 nginx-with-tls13-compile.sh 对 nginx.service,创建一个新文件: openssl-1.1-compile.sh.
sudo nano openssl-1.1-compile.sh添加脚本:
#!/bin/bash

## Compile OpenSSL
OPENSSL=openssl-1.1.1h.tar.gz

DONE=openssl-compile-done

if [ ! -f "${DONE}" ] ;then
    wget https://www.openssl.org/source/${OPENSSL}

    tar zxvf ${OPENSSL}

    cd $(basename $OPENSSL .tar.gz)

    ./config shared no-idea no-md2 no-mdc2 no-rc5 no-rc4 --prefix=/usr/local/

    make

    sudo make install

    cd ..

    touch ${DONE}
fi

export LD_LIBRARY_PATH=$LD_LIBRARY_PATH:/usr/local/lib64/

read -n1 -r -p "$(/usr/local/bin/openssl version) - Press any key to continue..." key

source ./nginx-with-tls13-compile.sh
代替 ”OPENSSL=openssl-1.1.1h.tar.gz” 使用您要安装的版本并使用 NGINX 重新编译。
11. 使脚本可执行:
chmod +x openssl-1.1-compile.sh12.运行命令:
./openssl-1.1-compile.sh等待重新编译过程完成 OpenSSL & NGINX.
如果我们可以帮助您或有补充,评论部分是开放的。