在本教程中,您将学习如何 激活 TLSNGINX 上的 v1.3. 这是什么意思 TLSv 1.3, 它有什么帮助 为什么 你需要 在网络服务器上 TLS 可以激活. 对于带有管理系统的服务器 VestaCP (CentOS 或 Ubuntu)有点困难 激活 TLS 1.3 比在 cPanel 服务器上更好,但这并非不可能。
内容
为什么更好 TLS 1.3比 TLS 1.2?
TLS (Transport Layer Security) 是 密码协议 这确保 连接安全 在计算机和它所属的网络之间。 TLS 它用于以下应用: 邮箱地址, 通讯, 语音和视频通话 (VoIP), 但特别是在 HTTPS. 确保用户的计算机或智能手机与访问页面的 Web 服务器之间的安全通信。
TLS 1.3 提供一个 更高的速度 连接客户端-服务器和一个 而且安全 通过消除一些算法。 之间的差异 TLSv1.2 和 TLSv1.3.
Despre HTTPS, SSL (Secure Sockets Layer)我在其他文章中也说过:
- 如何安装证书 SSL (HTTPS 连接)用于托管在没有 cPanel 的 NGINX 服务器上的网站或 VestaCP
- 重新编译 OpenSSL 1.1 & NGINX 1.25 用于 TLS 1.3分(CentOS 7)
- 如何移动博客或网站 WordPress 从 HTTP 开始 HTTPS (Nginx)
- 删除旧域 Certbot certificates (让我们加密证书)
如何在 NGINX 上启用 TLS 1.3?具有 VestaCP 管理的服务器 / CentOS
在你看到你如何激活之前 TLSv1.3 on NGINX,你需要考虑一些最低要求 TLS 1.3.
- NGINX 1.13.x 或更高版本
- 证书 TLS 有效
- 具有正确配置的 DNS 的活动域名 – 可在 Internet 上访问
- 证书 TLS / SSL 有效的。 也可以 Let’s Encrypt.
Pe VestaCP 很久以前安装的,我们只有可用的协议 TLS 1.2. 我在许多教程中看到它就足够了 nginx.conf 让我们为 ca 添加以下行 TLS 1.3 待激活:
server {

  listen 443 ssl http2;
  listen [::]:443 ssl http2;

  server_name example.com;
  root /var/www/example.com/public;

  ssl_certificate /path/to/your/certificate.crt;
  ssl_certificate_key /path/to/your/private.key;

  ssl_protocols TLSv1.2 TLSv1.3;
伪造的。 如果 服务器 CentOS 与管理 VestaCP, NGINX 尚未编译 最低版本 OpenSSL 1.1.1.1, ssl_protocols TLSv1.2 TLSv1.3; 酒店于 nginx.conf .. 它根本没有帮助。
[root@north ~]# nginx -V
nginx version: nginx/1.22.0
built by gcc 4.8.5 20150623 (Red Hat 4.8.5-44) (GCC)
built with OpenSSL 1.0.2k-fips  26 Jan 2017
TLS SNI support enabled
所以在上面的例子中 Nginx 1.22.0 是兼容版本 TLS 1.3,但是库没有帮助我们 OpenSSL 1.0.2k-fips.
激活 TLSv1.3 on Nginx,需要先安装子库和开发包。 Development Tools. 它运行在 CentOS 7个命令行:
yum install gcc gcc-c++ pcre-devel zlib-devel make unzip gd-devel perl-ExtUtils-Embed libxslt-devel openssl-devel perl-Test-Simple
yum groupinstall 'Development Tools'
1.安装最新版本 OpenSSL
此时最新版本为 OpenSSL 1.1.1p,但据我所知,已经有并且 OpenSSL 3. 你可以找到来源 OpenSSL。ORG.
cd /usr/src
wget https://www.openssl.org/source/openssl-1.1.1p.tar.gz
tar xvf openssl-1.1.1p.tar.gz
mv openssl-1.1.1p openssl
cd openssl
./config --prefix=/usr/local/openssl --openssldir=/usr/local/openssl --libdir=/lib64 shared zlib-dynamic
make -j4
make test
make install
跑步很重要 make test 在安装库之前。 如果测试有错误,不要运行 make install 直到错误被纠正。
在下一步中,我们备份当前的二进制文件 openssl 然后我们添加 symlink 到新的。
mv /usr/bin/openssl /usr/bin/openssl-backup
ln -s /usr/local/openssl/bin/openssl /usr/bin/openssl
在 /usr/local/openssl/bin 执行 ldd 检查依赖关系 openssl. 我们也可以检查的版本 openssl. 命令 openssl version.
[root@north bin]# ldd openssl
	linux-vdso.so.1 =>  (0x00007ffd20bd7000)
	libssl.so.1.1 => /lib64/libssl.so.1.1 (0x00007fab09b62000)
	libcrypto.so.1.1 => /lib64/libcrypto.so.1.1 (0x00007fab09675000)
	libdl.so.2 => /lib64/libdl.so.2 (0x00007fab09471000)
	libpthread.so.0 => /lib64/libpthread.so.0 (0x00007fab09255000)
	libc.so.6 => /lib64/libc.so.6 (0x00007fab08e87000)
	/lib64/ld-linux-x86-64.so.2 (0x00007fab09df5000)
[root@north bin]# openssl version
OpenSSL 1.1.1p  21 Jun 2022
我们目前安装了最新版本 OpenSSL 经久不衰 TLSv1.3. 我们可以检查版本 TLS / SSL 书店支持 OpenSSL 按命令:
[root@north bin]# openssl ciphers -v | awk '{print $2}' | sort | uniq
SSLv3
TLSv1
TLSv1.2
TLSv1.3
[root@north bin]#
这并不意味着在经理的帮助下托管的网站 VestaCP 他们将立即拥有 TLS 1.3.
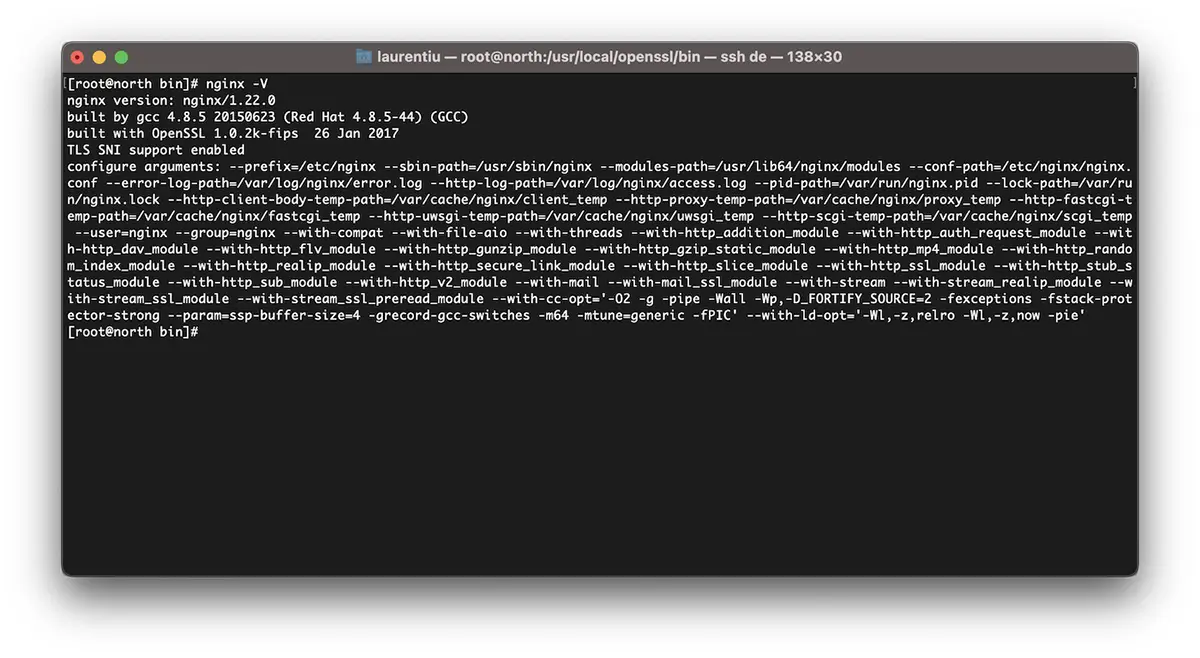
虽然我们已经安装 OpenSSL 1.1.1p, Nginx 是用老版本编译的 OpenSSL 1.0.2k-fips.
[root@north bin]# nginx -V
nginx version: nginx/1.22.0
built by gcc 4.8.5 20150623 (Red Hat 4.8.5-44) (GCC)
built with OpenSSL 1.0.2k-fips  26 Jan 2017
TLS SNI support enabled
configure arguments: --prefix=/etc/nginx --sbin-path=/usr/sbin/nginx --modules-path=/usr/lib64/nginx/modules --conf-path=/etc/nginx/nginx.conf --error-log-path=/var/log/nginx/error.log --http-log-path=/var/log/nginx/access.log --pid-path=/var/run/nginx.pid --lock-path=/var/run/nginx.lock --http-client-body-temp-path=/var/cache/nginx/client_temp --http-proxy-temp-path=/var/cache/nginx/proxy_temp --http-fastcgi-temp-path=/var/cache/nginx/fastcgi_temp --http-uwsgi-temp-path=/var/cache/nginx/uwsgi_temp --http-scgi-temp-path=/var/cache/nginx/scgi_temp --user=nginx --group=nginx --with-compat --with-file-aio --with-threads --with-http_addition_module --with-http_auth_request_module --with-http_dav_module --with-http_flv_module --with-http_gunzip_module --with-http_gzip_static_module --with-http_mp4_module --with-http_random_index_module --with-http_realip_module --with-http_secure_link_module --with-http_slice_module --with-http_ssl_module --with-http_stub_status_module --with-http_sub_module --with-http_v2_module --with-mail --with-mail_ssl_module --with-stream --with-stream_realip_module --with-stream_ssl_module --with-stream_ssl_preread_module --with-cc-opt='-O2 -g -pipe -Wall -Wp,-D_FORTIFY_SOURCE=2 -fexceptions -fstack-protector-strong --param=ssp-buffer-size=4 -grecord-gcc-switches -m64 -mtune=generic -fPIC' --with-ld-opt='-Wl,-z,relro -Wl,-z,now -pie'
[root@north bin]# openssl version
OpenSSL 1.1.1p  21 Jun 2022
[root@north bin]#
2.为系统重新编译Nginx VestaCP
这一步我们需要重新编译 OpenSSL 已安装的 Nginx 版本 在系统上 CentOS / VestaCP. 正如我上面所说,就我而言,它是关于 nginx/1.22.0. 由于我们正在谈论一个具有 VestaCP 管理系统,在我们开始重新编译之前,最好备份 nginx 配置文件。
备份系统上当前的 Nginx VestaCP
将目录存档并保存在服务器上的某个位置“/etc/nginx“和”/usr/local/vesta/nginx“。
跑步 nginx -V 并将现有模块保存到文件中。
configure arguments: --prefix=/etc/nginx --sbin-path=/usr/sbin/nginx --modules-path=/usr/lib64/nginx/modules --conf-path=/etc/nginx/nginx.conf --error-log-path=/var/log/nginx/error.log --http-log-path=/var/log/nginx/access.log --pid-path=/var/run/nginx.pid --lock-path=/var/run/nginx.lock --http-client-body-temp-path=/var/cache/nginx/client_temp --http-proxy-temp-path=/var/cache/nginx/proxy_temp --http-fastcgi-temp-path=/var/cache/nginx/fastcgi_temp --http-uwsgi-temp-path=/var/cache/nginx/uwsgi_temp --http-scgi-temp-path=/var/cache/nginx/scgi_temp --user=nginx --group=nginx --with-compat --with-file-aio --with-threads --with-http_addition_module --with-http_auth_request_module --with-http_dav_module --with-http_flv_module --with-http_gunzip_module --with-http_gzip_static_module --with-http_mp4_module --with-http_random_index_module --with-http_realip_module --with-http_secure_link_module --with-http_slice_module --with-http_ssl_module --with-http_stub_status_module --with-http_sub_module --with-http_v2_module --with-mail --with-mail_ssl_module --with-stream --with-stream_realip_module --with-stream_ssl_module --with-stream_ssl_preread_module --with-cc-opt='-O2 -g -pipe -Wall -Wp,-D_FORTIFY_SOURCE=2 -fexceptions -fstack-protector-strong --param=ssp-buffer-size=4 -grecord-gcc-switches -m64 -mtune=generic -fPIC' --with-ld-opt='-Wl,-z,relro -Wl,-z,now -pie'
如何重新编译 Nginx 以进行升级 OpenSSL / CentOS 7
我重复。 如果你有 VestaCP,下载您已经安装的 Nginx 版本。 你可以找到所有带有 Nginx 版本的档案 nginx 网站.
cd /usr/src
wget https://nginx.org/download/nginx-1.22.0.tar.gz
tar xvf nginx-1.22.0.tar.gz
cd nginx-1.22.0
我们重新编译 nginx 模块:
./configure --prefix=/etc/nginx \
--sbin-path=/usr/sbin/nginx \
--modules-path=/usr/lib64/nginx/modules \
--conf-path=/etc/nginx/nginx.conf \
--error-log-path=/var/log/nginx/error.log  \
--http-log-path=/var/log/nginx/access.log  \
--pid-path=/var/run/nginx.pid  \
--lock-path=/var/run/nginx.lock  \
--http-client-body-temp-path=/var/cache/nginx/client_temp  \
--http-proxy-temp-path=/var/cache/nginx/proxy_temp  \
--http-fastcgi-temp-path=/var/cache/nginx/fastcgi_temp  \
--http-uwsgi-temp-path=/var/cache/nginx/uwsgi_temp  \
--http-scgi-temp-path=/var/cache/nginx/scgi_temp  \
--user=nginx  \
--group=nginx  \
--with-compat  \
--with-file-aio  \
--with-threads  \
--with-http_addition_module  \
--with-http_auth_request_module  \
--with-http_dav_module  \
--with-http_flv_module  \
--with-http_gunzip_module  \
--with-http_gzip_static_module  \
--with-http_mp4_module  \
--with-http_random_index_module  \
--with-http_realip_module  \
--with-http_secure_link_module  \
--with-http_slice_module  \
--with-http_ssl_module  \
--with-http_stub_status_module  \
--with-http_sub_module  \
--with-http_v2_module  \
--with-mail  \
--with-mail_ssl_module  \
--with-stream  \
--with-stream_realip_module  \
--with-stream_ssl_module  \
--with-stream_ssl_preread_module  \
--with-openssl=/usr/src/openssl  \
--with-cc-opt='-O2 -g -pipe -Wall -Wp,-D_FORTIFY_SOURCE=2 -fexceptions -fstack-protector-strong  \
--param=ssp-buffer-size=4 -grecord-gcc-switches -m64 -mtune=generic -fPIC'  \
--with-ld-opt='-Wl,-z,relro -Wl,-z,now -pie'
make -j4
make install我们现在已经安装了 Nginx 并使用最新版本编译 OpenSSL 能够承受 TLSv1.3。
[root@north bin]# nginx -V
nginx version: nginx/1.22.0
built by gcc 4.8.5 20150623 (Red Hat 4.8.5-44) (GCC)
built with OpenSSL 1.1.1p  21 Jun 2022
TLS SNI support enabled
*如果服务器上已经安装了 nginx,则需要将其卸载。 编译不适用于 nginx 升级。
如何在 VestaCP 上为域名启用 TLSv1.3?
在文件中 /etc/nginx/nginx.conf 我们添加以下行:
ssl_protocols TLSv1.2 TLSv1.3;
ssl_prefer_server_ciphers on;
ssl_ciphers 'ECDHE-ECDSA-AES256-GCM-SHA384:ECDHE-RSA-AES256-GCM-SHA384:ECDHE-ECDSA-CHACHA20-POLY1305:ECDHE-RSA-CHACHA20-POLY1305:ECDHE-ECDSA-AES128-GCM-SHA256:ECDHE-RSA-AES128-GCM-SHA256:ECDHE-ECDSA-AES256-SHA384:ECDHE-RSA-AES256-SHA384:ECDHE-ECDSA-AES128-SHA256:ECDHE-RSA-AES128-SHA256';
在域级别,我更改了模板中的一些内容 VestaCP 并启用 HTTP/2. 因此,当添加启用了 Let's Encrypt 的新域 (example.com) 时,我有以下配置文件 SSL:
cat /home/vestacpuser/conf/web/example.com.nginx.ssl.conf

server {
    listen      IP.IP.IP.IP:443 ssl http2;
    server_name example.com www.example.com;
    root        /home/vestacpuser/web/example.com/public_html;
    index       index.php index.html index.htm;
    access_log  /var/log/nginx/domains/example.com.log combined;
    access_log  /var/log/nginx/domains/example.com.bytes bytes;
    error_log   /var/log/nginx/domains/example.com.error.log error;

    ssl_certificate      /home/vestacpuser/conf/web/ssl.example.com.pem;
    ssl_certificate_key  /home/vestacpuser/conf/web/ssl.example.com.key;

....

ssl_protocols TLSv1.2 TLSv1.3;
ssl_prefer_server_ciphers on;
ssl_ciphers 'ECDHE-ECDSA-AES256-GCM-SHA384:ECDHE-RSA-AES256-GCM-SHA384:ECDHE-ECDSA-CHACHA20-POLY1305:ECDHE-RSA-CHACHA20-POLY1305:ECDHE-ECDSA-AES128-GCM-SHA256:ECDHE-RSA-AES128-GCM-SHA256:ECDHE-ECDSA-AES256-SHA384:ECDHE-RSA-AES256-SHA384:ECDHE-ECDSA-AES128-SHA256:ECDHE-RSA-AES128-SHA256';
在重启 nginx 之前,最好先测试一下它的配置。
[root@north web]# nginx -t
nginx: the configuration file /etc/nginx/nginx.conf syntax is ok
nginx: configuration file /etc/nginx/nginx.conf test is successful
[root@north web]# systemctl restart nginx
我希望本教程对您有所帮助,如果您遇到困难,请在评论中留下问题的详细信息。